GE Double Oven Manual: A Comprehensive Guide
This manual provides detailed instructions for GE double ovens, assisting users in understanding features, operation, and maintenance for optimal performance and longevity.

Understanding Your GE Double Oven
GE double ovens offer versatile cooking solutions with two separate oven cavities, allowing for simultaneous baking and roasting at different temperatures. Familiarizing yourself with your oven’s specific features is crucial for efficient operation. These ovens often include convection cooking for faster, more even results, alongside standard bake settings.
The control panel is your primary interface, offering digital or electronic controls for precise temperature management and timer settings. Many models feature self-cleaning cycles for convenient maintenance, and warming drawers to keep cooked food at serving temperature. Understanding these components and their functions will unlock the full potential of your GE double oven, ensuring delicious meals and hassle-free cooking experiences.
Locating the Model and Serial Number
Identifying your GE oven’s model and serial number is essential for accessing support, manuals, and replacement parts, ensuring proper appliance servicing.
Where to Find the Model Number ⎯ Exterior
Locating the model number on the exterior of your GE double oven is typically the easiest method. Begin by inspecting the front panel, often around the oven door frame or control panel area. The model number is usually affixed to a sticker or directly imprinted onto the metal.
Look closely for a label that includes both the model number and serial number; these are often grouped together. Sometimes, the label is situated on the side of the oven, near the hinges, or even on the back panel if the oven is accessible. If it’s a slide-in model, check the area where the oven slides under the countertop.
Carefully examine all visible exterior surfaces, as the placement can vary depending on the specific GE oven model. A flashlight can be helpful for illuminating hard-to-see areas.
Where to Find the Model Number ⎯ Interior
If the model number isn’t readily visible on the exterior, check inside the oven cavity. Open both the upper and lower oven doors and carefully inspect the sides of the oven interior walls. GE often places a sticker or imprinted label in these locations.
Look along the frame surrounding the oven windows, or near the oven light fixture. Sometimes, the label is hidden on the back wall, requiring you to use a flashlight to see it clearly. It’s also worth checking the edges of the oven racks themselves, though this is less common.
Remember to exercise caution when looking inside the oven, ensuring it is cool to the touch and power is off if possible. The model and serial numbers are usually printed together on the same label.
Decoding the Model Number
Understanding your GE oven’s model number reveals crucial details about your appliance. The combination of letters and numbers signifies the oven’s type, capacity, color, fuel type, style, brand, and even the manufacturing year. Each segment holds specific information.
Typically, the first few characters indicate the appliance category (e.g., range, oven), followed by details about its features and size. Subsequent numbers often denote the color and manufacturing date. Decoding this information allows you to pinpoint compatible replacement parts and access the correct service manuals.
GE’s website offers resources to help decipher specific model number codes, ensuring you have accurate information for maintenance and repairs. Knowing your oven’s specifics streamlines troubleshooting and ensures optimal performance.

Key Features of GE Double Ovens
GE double ovens boast convection cooking, self-cleaning cycles, temperature probes, and warming drawers, offering versatility and convenience for all your culinary needs.
Convection Cooking Explained
Convection cooking utilizes a fan to circulate hot air within the oven, resulting in faster and more even cooking compared to traditional baking methods. This consistent temperature distribution eliminates hot spots, ensuring food is cooked thoroughly and uniformly.
GE double ovens often feature true convection, meaning a heating element is positioned near the fan, actively reheating the air as it circulates. This maintains a consistent temperature even with the oven door opened. Benefits include reduced cooking times – typically 25% faster – and the ability to cook multiple dishes simultaneously without flavor transfer.
For optimal results, reduce the recipe temperature by 25°F when using convection. Convection is ideal for roasting meats, baking cookies, and preparing casseroles, delivering crispy exteriors and moist interiors. Experimenting with convection settings will unlock a new level of culinary precision.
Self-Cleaning Function: A Detailed Look
GE double ovens offer a self-cleaning function utilizing high temperatures to burn off food residue, eliminating the need for manual scrubbing. This process typically takes 2-4 hours, depending on the soil level selected – light, medium, or heavy. Before initiating the cycle, remove oven racks, cookware, and any loose debris.
During self-cleaning, the oven door automatically locks for safety and remains locked until the cycle is complete and the oven has cooled sufficiently. A strong odor may be present during operation, so ensure adequate ventilation. It’s crucial to avoid opening the door mid-cycle.
After the cycle finishes, allow the oven to cool completely before wiping away any remaining ash. Regularly using the self-clean function prevents buildup and maintains optimal oven performance. Always consult the full manual for specific instructions and safety precautions related to your model.
Temperature Probe Usage
GE double ovens often include a temperature probe for precise cooking, especially beneficial for roasts and larger cuts of meat. Insert the probe into the thickest part of the food, avoiding bone or fat. Connect the probe to the oven’s designated port, and set the desired final internal temperature using the control panel.
The oven will automatically shut off when the set temperature is reached, ensuring perfectly cooked results. This eliminates guesswork and prevents overcooking. Ensure the probe is clean before and after each use for hygienic cooking.
Refer to your oven’s manual for specific probe placement guidelines and compatible cooking modes. Proper probe usage guarantees food safety and consistently delicious meals. Always exercise caution when handling the probe, as it may be hot after use.
Warming Drawer Functionality
GE double ovens frequently feature a warming drawer, ideal for keeping cooked foods at serving temperature without overcooking. This drawer operates at a lower temperature than the ovens, preventing food from drying out. It’s perfect for rolls, casseroles, or holding dishes while awaiting serving.
To use the warming drawer, simply place the food inside and select the desired warming setting on the control panel. Some models offer adjustable temperature settings for greater control. Avoid using the warming drawer for prolonged periods, as it doesn’t reheat food, only maintains temperature.
Never use the warming drawer to proof dough or store items. Always check food temperature before serving to ensure it remains safe for consumption. Refer to your oven’s manual for specific warming drawer settings and guidelines.

Operating Instructions
This section details how to effectively use your GE double oven, covering control panel navigation, temperature settings, timer functions, and delayed start programming.
Using the Control Panel
The control panel is your primary interface for operating your GE double oven, offering a range of functions at your fingertips. Typically, it features a digital display and various buttons or a touchscreen for selecting oven modes, setting temperatures, and programming cooking times.
Familiarize yourself with the key buttons: ‘Bake’, ‘Broil’, ‘Convection Bake’, ‘Convection Roast’, and ‘Warm’. Use the arrow keys to adjust temperature and time settings, and the ‘Start’ button to initiate cooking. The ‘Clear/Off’ button cancels selections or turns off the oven.
Many models include preset cooking programs for common dishes, simplifying the cooking process. Explore the panel to discover these convenient options. Refer to your specific model’s manual for detailed explanations of each button and feature, ensuring optimal control and performance.
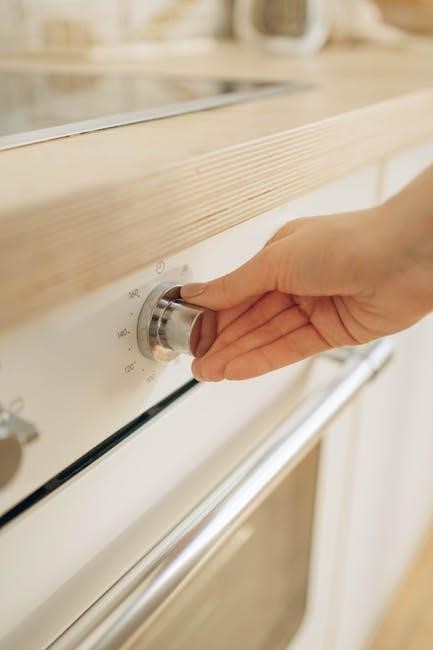
Setting the Oven Temperature
Adjusting the oven temperature is crucial for successful cooking. After selecting your desired cooking mode – Bake, Broil, or Convection – use the up and down arrow keys on the control panel to set the precise temperature needed for your recipe. The digital display will show the set temperature.
GE ovens often allow temperature adjustments in increments of 5 or 10 degrees Fahrenheit. For accurate results, always double-check the displayed temperature before starting. Remember that convection cooking typically requires a lower temperature than conventional baking, usually reducing it by 25 degrees Fahrenheit.
Some models feature a ‘Temperature Hold’ function, maintaining a consistent temperature for extended periods. Consult your oven’s manual for specific temperature ranges and recommendations for various cooking applications.
Utilizing the Timer Function
The timer function on your GE double oven is a versatile tool for managing cooking time. You can set a timer to alert you when your dish is finished, even if the oven isn’t actively cooking. To activate, press the ‘Timer’ button on the control panel, then use the number pads to input the desired duration in minutes and seconds.
Many models offer two timer options: a ‘Kitchen Timer’ for general use and a ‘Cook Time’ timer that automatically shuts off the oven when the time expires. Ensure you select the appropriate timer based on your needs. The timer will emit an audible beep when it reaches zero.
To cancel the timer, press the ‘Clear/Off’ button. Refer to your specific model’s manual for detailed instructions and any additional timer features.
Programming Delayed Start
The Delayed Start feature allows you to set your GE double oven to begin cooking at a later time. This is incredibly convenient for meal preparation. First, select your desired cooking function, temperature, and cook time. Then, press the ‘Delayed Start’ button. The display will prompt you to enter the desired start time using the number pads.
Confirm the start time and press ‘Start’. The oven will remain in standby mode until the programmed time is reached, then automatically begin cooking. Ensure sufficient time is allowed for preheating if necessary.
To cancel a programmed delayed start, press the ‘Clear/Off’ button. Always verify the oven is empty before setting a delayed start to prevent unwanted cooking.
Troubleshooting Common Issues
This section details solutions for frequent GE double oven problems, including heating failures, control panel errors, self-clean issues, and deciphering error codes.
Oven Not Heating
If your GE double oven isn’t heating, first verify the power supply and ensure the oven is properly connected. Check the control panel to confirm the oven is set to the correct cooking mode and temperature – a delayed start might be activated.
Next, inspect the oven’s heating elements (bake and broil) for any visible signs of damage, like blistering or breaks. A faulty element will need replacement. Also, examine the igniter (gas ovens) for glowing; if it doesn’t glow, it may be defective.
For electric ovens, a failed oven temperature sensor can prevent heating. Test the sensor with a multimeter for continuity. Finally, a malfunctioning control board could be the culprit; professional diagnosis is recommended in such cases. Always disconnect power before inspecting internal components.
Control Panel Malfunctions
When encountering control panel issues with your GE double oven, begin by checking for simple causes like a tripped circuit breaker or a power surge. If the panel is completely unresponsive, attempt a reset by turning off the oven’s power at the breaker for several minutes, then restoring it.
For touchscreens that are frozen or displaying errors, try a soft reset – often a prolonged press of a specific button combination (consult your model’s manual). If buttons aren’t responding, gently clean the panel surface.
Persistent malfunctions, such as incorrect temperature displays or inability to select functions, usually indicate a faulty control board. This requires professional repair or replacement. Avoid attempting complex repairs yourself; safety is paramount.
Self-Clean Cycle Problems
If your GE double oven’s self-clean cycle isn’t functioning correctly, first ensure the oven door is completely locked. A failed lock prevents the cycle from initiating. Check for error codes displayed on the control panel, referencing your model’s manual for specific meanings.
Common issues include a cycle that won’t start, one that stops prematurely, or excessive smoke. Remove all racks and cookware before running the cycle. Ensure proper ventilation in the kitchen. If smoke is excessive, immediately stop the cycle and consult a technician.
A lingering burning smell after the cycle is normal, but persistent odors may indicate a problem. Do not attempt to open the door during the cycle or immediately afterward, as the oven will be extremely hot.
Error Codes and Their Meanings
GE double ovens utilize error codes to diagnose internal issues. These codes appear on the control panel, signaling a problem requiring attention. The specific meaning varies significantly by model, so consulting your oven’s manual is crucial.
Common codes might indicate a faulty temperature sensor, a heating element malfunction, or issues with the control board. For example, an “F1” code could signify a communication error, while “F2” might point to a sensor failure.
Do not attempt repairs based solely on the error code; improper diagnosis can worsen the problem. Record the code before contacting GE’s customer support or a qualified appliance technician for accurate troubleshooting and repair guidance.
Maintenance and Care
Regular cleaning and upkeep are essential for maintaining your GE double oven’s performance and extending its lifespan, ensuring years of reliable service.
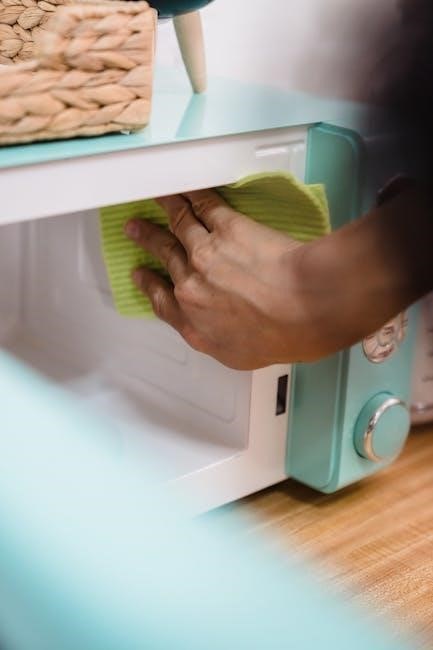
Cleaning the Oven Interior
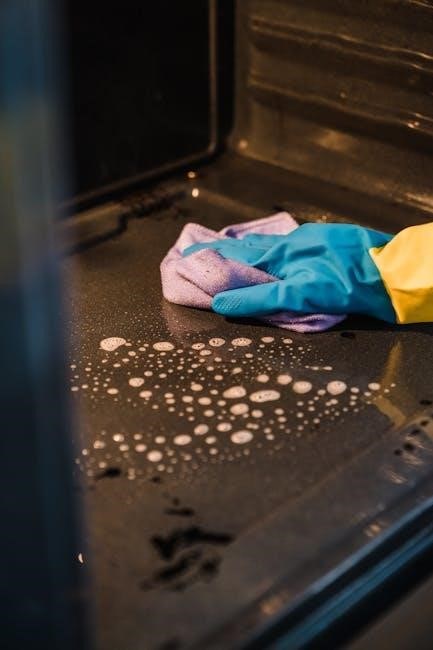
Maintaining a clean oven interior is crucial for both hygiene and performance. For light cleaning, a damp cloth with mild dish soap often suffices, wiping away spills and food residue promptly. However, for baked-on messes, the self-cleaning function is incredibly useful – remember to remove racks and any cookware beforehand.
If you prefer manual cleaning, a paste of baking soda and water can be applied, left for several hours, then scrubbed away. Avoid abrasive cleaners, as they can damage the oven’s surface. Always ensure the oven is completely cool before cleaning. Regularly wiping up spills prevents buildup, reducing the need for intensive cleaning sessions. A clean interior promotes even cooking and prevents unpleasant odors.
Cleaning the Oven Exterior
Keeping the exterior of your GE double oven clean enhances its appearance and prevents buildup of grease and grime. Regularly wipe down the control panel, door, and surrounding surfaces with a soft, damp cloth and mild dish soap. Avoid using abrasive cleaners or scouring pads, as these can scratch the finish.
For stainless steel exteriors, specialized stainless steel cleaners are recommended to maintain their shine and prevent streaks. Pay attention to the area around the oven door, where fingerprints and splatters are common. A microfiber cloth is ideal for polishing and achieving a streak-free finish. Promptly address spills to prevent staining and maintain a pristine look.
Replacing Oven Bulbs
Replacing a burnt-out oven bulb is a straightforward process, restoring visibility inside your GE double oven. Always disconnect the power to the oven at the circuit breaker before attempting any repairs. Locate the bulb access panel, typically found on the back of the oven interior. Remove the panel cover, often secured with screws.
Carefully unscrew the old bulb and replace it with a new bulb of the correct wattage – consult your owner’s manual for specifications. Avoid touching the new bulb with bare hands; use a cloth or gloves to prevent oil transfer. Reinstall the access panel and restore power. If the bulb still doesn’t illuminate, double-check the connection and bulb type.
Maintaining the Warming Drawer
The warming drawer requires periodic cleaning to ensure optimal performance and hygiene. Always disconnect power before cleaning. Remove the drawer by gently pulling it out until it stops, then lift upwards. Wash the drawer and its rack with warm, soapy water; avoid abrasive cleaners. Rinse thoroughly and dry completely before reinstalling.
Wipe down the interior of the warming drawer cavity with a damp cloth. For stubborn spills, a paste of baking soda and water can be used, followed by a clean rinse. Ensure the heating element is free from debris. Reinsert the drawer, aligning the rails, and push it in until secure. Regular cleaning prevents odors and maintains consistent warming temperatures.
Safety Precautions
Prioritize safety by following guidelines regarding general use, carbon monoxide risks, and utilizing child safety locks for secure operation of your GE oven.
General Safety Guidelines
Always exercise caution when operating your GE double oven to prevent injury or damage. Never allow children to use the oven unsupervised, and keep flammable materials away from heating elements. Ensure proper ventilation during operation, and avoid touching hot surfaces – use oven mitts or pot holders.
Regularly inspect the oven for any signs of damage, such as cracked glass or faulty wiring, and discontinue use if issues are detected. Do not attempt to repair the oven yourself; contact a qualified technician for assistance. Be mindful of steam or hot air released when opening the oven door.
Avoid using harsh chemicals or abrasive cleaners, as they can damage the oven’s surfaces. Always disconnect the power supply before cleaning or performing maintenance. Following these guidelines will ensure safe and reliable operation of your GE double oven.
Carbon Monoxide Safety
Carbon monoxide (CO) is a colorless, odorless gas that can be produced by malfunctioning gas ovens. GE prioritizes safety, but proper operation and maintenance are crucial. Install a CO detector near your kitchen, following manufacturer’s instructions for placement and testing.
If your GE double oven uses gas, ensure adequate ventilation during operation. Never use the oven for heating your home. If you suspect a gas leak or CO poisoning – experiencing headache, dizziness, nausea – immediately evacuate the area and call your gas company or emergency services.
Regular professional inspections of your gas oven are recommended to ensure proper combustion and prevent CO buildup. Do not ignore any unusual smells or changes in flame color. Prioritize safety and protect your family.
Child Safety Locks
GE double ovens may feature control panel locks designed to prevent accidental operation by children. These locks disable the buttons, preventing changes to settings or starting the oven. Refer to your specific model’s manual for instructions on activating and deactivating the control lock feature.
Some models utilize a dedicated “Lock” or “Control Lock” button, while others require a specific button combination. Always ensure the lock is engaged when children are present and unsupervised. Additionally, be mindful of the oven’s exterior surfaces, which can become hot during and after use.
Teach children about the dangers of hot appliances and emphasize that they should never operate the oven without adult supervision. Regularly check the lock functionality to ensure it’s working correctly, contributing to a safer kitchen environment.
GE Oven Model Lookup Resources
Locating your GE oven’s model number is crucial for accessing manuals, parts, and support; utilize the GE website, reverse image searches, or online identifiers.
Using the GE Appliances Website
The GE Appliances website (geappliances.com) is a primary resource for finding information specific to your double oven model. Begin by navigating to the “Support” or “Owners Manuals” section. You’ll typically be prompted to enter your model number – a crucial step for accurate results.
Once your model is identified, the website provides access to downloadable owner’s manuals, installation guides, and specification sheets. These documents contain detailed operating instructions, troubleshooting tips, and safety precautions tailored to your oven.
Furthermore, the GE website often features FAQs, how-to videos, and a parts store where you can order replacement components directly. Utilizing the site’s search function with specific keywords related to your issue can also quickly pinpoint relevant information. It’s a comprehensive hub for all GE oven-related needs.
Reverse Image Search for Identification
If you’re struggling to locate the model number directly on your GE double oven, a reverse image search can be surprisingly effective. Take a clear, well-lit photograph of your oven, focusing on the control panel and any visible exterior features.
Then, utilize search engines like Google Images, TinEye, or Yandex Images. Upload your photo, and the engine will search for visually similar images online. Often, this will lead you to product listings or appliance identification guides that reveal your oven’s model number.
This method is particularly useful for older models where the label may be faded or missing. Remember to try multiple angles and close-ups for the best results, increasing the chances of a successful identification.
Online Appliance Identifier Tools
Several websites specialize in identifying appliances based on visual characteristics. These online tools often ask you to input details like appliance type (oven), brand (GE), and features (double oven, convection, etc.). Some may even request you to upload a photograph for more accurate identification.
Popular options include appliance identification databases and forums where users can assist in pinpointing your model. These resources can be invaluable when the model number is obscured or missing. Be prepared to provide as much detail as possible about your oven’s appearance and functionality.
While these tools aren’t always foolproof, they offer a convenient alternative to manual searching and can significantly narrow down the possibilities, leading you closer to finding the correct model number.