
Black & Decker Air Fryer Toaster Oven Manual: A Comprehensive Guide
Black & Decker ovens offer versatile cooking with air frying, toasting, and baking; this manual details operation, safety, and maintenance for optimal performance.
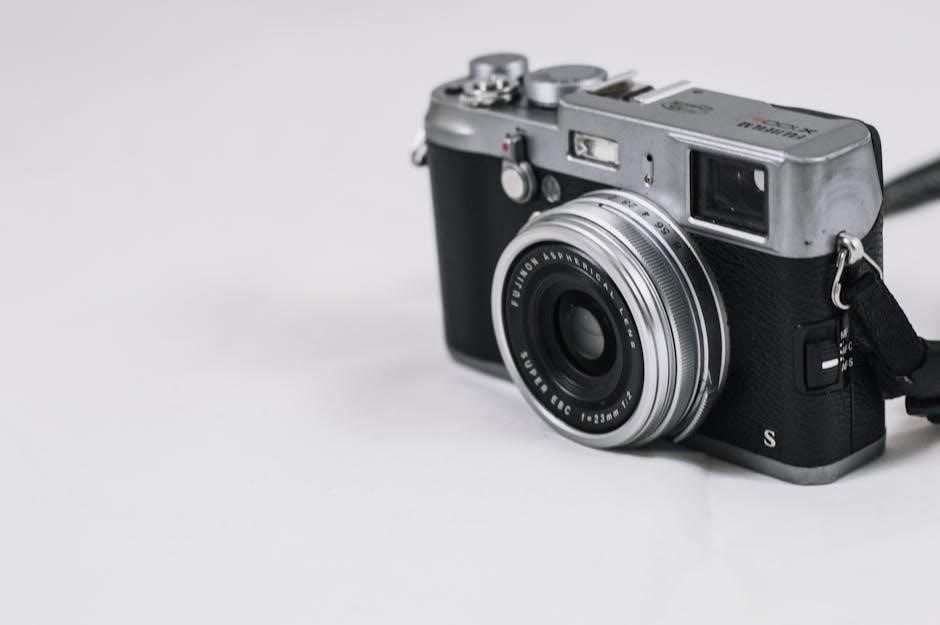
Black & Decker Air Fryer Toaster Ovens combine multiple appliances into one convenient unit, offering versatility for modern kitchens. These ovens excel at baking, broiling, toasting, and, crucially, air frying – delivering crispy results with less oil. This manual provides comprehensive guidance for models like TO3215SS, TO3217SS, and TO1787SS, ensuring users can confidently utilize all features. Discover deep-fried taste without the fat, thanks to innovative Air Fry Technology!
Understanding Key Features
Black & Decker Air Fryer Toaster Ovens boast several key features for enhanced cooking. Air Fry Technology utilizes high-intensity hot air for crispy, oil-free results. Precise toasting functions with adjustable shade settings ensure perfect bread every time. Baking and broiling capabilities offer versatility for diverse recipes. The intuitive control panel, featuring timer and temperature knobs, simplifies operation, making it a user-friendly kitchen appliance.
Air Fry Technology Explained

Black & Decker’s Air Fry Technology delivers the taste of deep-fried foods with significantly less oil. This innovative feature employs rapid air circulation to bake, brown, and crisp your favorite snacks and meals. Enjoy healthier versions of French fries, veggie chips, and breaded items. It’s a convenient way to achieve crispy textures without excessive fat, promoting a balanced diet.

Toasting Functions & Settings
The Black & Decker air fryer toaster oven offers adjustable toast shade settings to customize your browning preferences. Select from a range of options, typically numbered 1-6, with 1 being the lightest and 6 the darkest. Experiment to find your ideal setting for various bread types. Achieving even toasting relies on consistent bread thickness and proper rack placement.
Baking & Broiling Capabilities
Your Black & Decker oven excels at baking and broiling. For baking, preheating is recommended for consistent results. Utilize the ‘Bake’ setting and adjust temperature based on recipe guidelines. Broiling uses high heat from above, ideal for browning. Always monitor food closely during broiling to prevent burning. Recommended baking temperatures and times vary by dish.

Model-Specific Information (TO3215SS, TO3217SS, TO1787SS)
Black & Decker offers several models, including TO3215SS, TO3217SS, and TO1787SS. Each features air fry functionality, but control panel layouts and specific settings may differ. Replacement parts are available for each model. Refer to your specific model’s user manual for detailed instructions and diagrams. Finding parts is simplified through online resources and customer service.
Setting Up Your Air Fryer Toaster Oven
Before first use, thoroughly clean the interior and exterior of your Black & Decker oven. Ensure proper ventilation by placing the oven on a heat-resistant surface with adequate space around all sides. Avoid placing it near flammable materials. Initial preparation involves removing all packaging and familiarizing yourself with the components.
Initial Cleaning & Preparation
Prior to the initial use, wipe down the interior with a damp cloth to remove any manufacturing residue. Wash the air fry rack and any included baking pans with warm, soapy water, ensuring they are fully dried before re-inserting. This prepares the oven for optimal performance and eliminates any potential odors during the first cooking cycle.
Placement & Ventilation Requirements
Position your Black & Decker air fryer toaster oven on a stable, heat-resistant surface with adequate ventilation. Ensure at least six inches of space are available on all sides, particularly the rear, to prevent overheating and ensure proper air circulation. Avoid placing it under cabinets or near flammable materials for safety.
Using the Air Fry Function
To utilize the air fry feature on your Black & Decker TO3215SS, place food on the mesh rack, then slide it into the oven. Set the temperature selector to “AIR FRY” and the timer knob to your desired cooking time, starting with 20 minutes. Enjoy deep-fried taste with little to no oil!
Preparing Food for Air Frying
For optimal air frying results, ensure food is placed directly on the air fry mesh rack, allowing hot air to circulate effectively. Consider lightly coating food with oil for enhanced crispness, though it’s not always necessary. Avoid overcrowding the rack; work in batches for even cooking and maximum crunch.
Air Fry Rack Placement

When utilizing the air fry function on your Black & Decker TO3215SS, slide the air fry mesh rack into the middle or lower rack position within the oven. This placement ensures proper air circulation around the food, promoting even cooking and optimal crisping. Adjust position based on food volume.
Temperature & Time Settings for Air Frying
For air frying, set the temperature selector knob to the designated “AIR FRY” position on your Black & Decker oven. Begin by turning the timer knob to 20 minutes, then adjust according to your recipe. Cooking times vary; monitor food closely for desired crispness. Experiment to find optimal settings!
Toaster Oven Operation: Toasting Bread
To toast bread, select your preferred shade setting using the toast shade selector. For even toasting, ensure bread slices are of uniform thickness. Monitor the toasting process, as results can vary. The Black & Decker oven delivers consistent toasting, but adjustments may be needed for different bread types.
Selecting Toast Shade Settings
The Black & Decker air fryer toaster oven features adjustable toast shade settings, ranging from light golden to dark brown. Lower numbers yield lighter toast, while higher numbers produce darker results. Experiment to find your ideal setting based on bread type and personal preference for perfectly toasted slices every time.
Even Toasting Techniques
For consistently even toasting with your Black & Decker oven, ensure bread slices are of uniform thickness. Avoid overcrowding the rack; toast in batches if necessary. If unevenness persists, rotate the bread halfway through the toasting cycle. Regularly cleaning the interior also contributes to optimal and consistent toasting performance.
Baking & Broiling with Your Black & Decker Oven
Black & Decker ovens excel at baking and broiling. Always preheat the oven before baking for consistent results. Recommended baking temperatures vary by recipe, but generally align with standard oven settings. For broiling, position the rack appropriately and monitor food closely to prevent burning. Consistent results are achieved with proper temperature and time settings.
Preheating Instructions
To ensure optimal baking and broiling, preheating your Black & Decker oven is crucial. Set the temperature selector knob to the desired degree, then turn the timer knob. Allow sufficient time for the oven to reach temperature – typically 5-10 minutes. A preheated oven guarantees even cooking and consistent results for all your favorite recipes.
Recommended Baking Temperatures & Times
For baking, a temperature range of 350°F to 400°F (175°C to 200°C) generally works well. Baking times will vary depending on the recipe; check for doneness regularly. When broiling, use a lower rack position and watch food closely to prevent burning. Adjust times based on your Black & Decker model and desired level of crispness.
Cleaning & Maintenance
Regular cleaning ensures optimal performance and longevity of your Black & Decker oven. Allow the unit to cool completely before cleaning. The crumb tray and air fry rack are dishwasher safe for easy cleanup. Wipe the interior and exterior with a damp cloth; avoid abrasive cleaners. Ensure all parts are dry before reassembly.
Cleaning the Interior & Exterior
After each use, disconnect the oven and allow it to cool. Wipe the interior with a damp cloth to remove food residue. For stubborn stains, use a mild dish soap solution. Clean the exterior with a damp cloth; avoid harsh chemicals. Never immerse the oven in water. Ensure all surfaces are thoroughly dried before reuse.
Dishwasher Safe Parts
The air fry mesh rack and baking pan are dishwasher safe for convenient cleaning. However, hand washing is recommended to prolong their lifespan. Avoid using abrasive cleaners or scouring pads, as they may damage the non-stick coating. Ensure parts are completely dry before reassembling. The oven housing and heating elements should never be placed in the dishwasher.
Troubleshooting Common Issues
If the oven isn’t heating, check the power cord and outlet. For uneven cooking, ensure proper rack placement and food arrangement. Avoid overcrowding. If food isn’t crisping during air frying, increase cooking time or temperature slightly. Regularly clean the interior to maintain optimal performance. Consult the manual for further assistance or contact customer support.
Oven Not Heating
If your Black & Decker oven fails to heat, first verify the power cord is securely plugged into a functioning outlet. Check your home’s circuit breaker or fuse box for tripped breakers or blown fuses. Ensure the timer is set correctly; some models won’t heat without a set time. If issues persist, consult the manual or contact support.
Uneven Cooking Problems
Black & Decker air fry toaster ovens may exhibit uneven cooking if food is overcrowded on the rack. Rotate food halfway through the cooking cycle for consistent results. Ensure the air fry rack is correctly positioned. Preheating the oven thoroughly is crucial. Refer to the manual for recommended rack placement and cooking times.
Safety Precautions
Always practice electrical safety; never immerse the oven in water. Avoid touching hot surfaces – use oven mitts. Ensure proper ventilation during operation to prevent overheating. Never leave the oven unattended while in use. Keep the oven away from flammable materials. Refer to the manual for detailed safety guidelines and warnings.
Electrical Safety Guidelines
Ensure the oven is properly grounded to prevent shock hazards. Never operate with a damaged cord or plug. Avoid using extension cords; plug directly into a wall outlet. Disconnect the oven when not in use and before cleaning. Do not attempt repairs yourself; contact qualified service personnel. Follow all electrical codes for safe operation.
Preventing Burns & Injuries
Always use oven mitts or pot holders when handling hot surfaces, including the door, rack, and baking pan. Allow the oven to cool completely before cleaning. Never touch heating elements during or immediately after use. Keep children away during operation. Exercise caution when opening the door, as steam may escape.
Replacement Parts & Support
Genuine Black & Decker replacement parts can be found online through various retailers, ensuring compatibility for models like TO3215SS and TO1787SS. For assistance, consult the parts diagram in your manual or visit the Black & Decker customer service website. Contact them directly for specific inquiries or warranty claims.
Finding Parts for Specific Models
Locating parts for your Black & Decker air fryer toaster oven, such as the TO3217SS, begins with identifying the exact model number. Online parts retailers often have search functions by model. Review your manual’s parts list for diagrams and part numbers, streamlining the process for replacements like racks or heating elements.
Contacting Black & Decker Customer Service
For assistance with your Black & Decker air fryer toaster oven, customer service offers support via phone or online. Consult the official Black & Decker website for contact details, including support phone numbers and links to online help resources. Have your model number ready for efficient assistance with questions or warranty claims.
Understanding the Control Panel
The Black & Decker air fryer toaster oven features a user-friendly control panel. The timer knob sets cooking duration, while the temperature selector controls heat levels, including a dedicated AIR FRY setting. Familiarize yourself with these controls for precise operation and optimal cooking results, ensuring consistent performance every time you use your appliance.
Timer Knob Functionality
The automatic timer knob on your Black & Decker oven dictates cooking time. Begin by turning the knob past the desired time to initiate the heating process; the oven will automatically shut off when the timer reaches zero. For air frying, set the timer to 20 minutes initially, then adjust as needed for perfect results.
Temperature Selector Knob
The temperature selector knob controls the oven’s heating function. Crucially, it features an AIR FRY position for utilizing the air frying technology, delivering crispy results with minimal oil. Other settings include options for baking and toasting. Ensure the knob is firmly set to your desired temperature for consistent cooking performance.
Recipes for Your Air Fryer Toaster Oven
Explore delicious possibilities! Try creating crispy Air Fryer French Fries – achieving deep-fried taste with significantly less oil. Alternatively, enjoy perfectly cooked Baked Chicken Wings, utilizing the air fry function for a healthier, flavorful meal. These recipes demonstrate the versatility of your Black & Decker oven.
Air Fryer French Fries Recipe
For perfectly crisp fries, toss cut potatoes with a tablespoon of oil and seasonings. Place them on the air fry mesh rack, ensuring a single layer for even cooking. Set the temperature to 400°F (200°C) and air fry for 15-20 minutes, flipping halfway through, achieving a delightful, healthier alternative!
Baked Chicken Wings Recipe

To create flavorful wings, marinate chicken pieces in your favorite sauce. Arrange them in a single layer on the air fry rack within your Black & Decker oven. Bake at 375°F (190°C) for approximately 25-30 minutes, flipping once. Enjoy crispy, juicy wings with minimal oil, a healthier indulgence for any occasion!
Warranty Information
Black & Decker provides a warranty covering defects in materials and workmanship. Coverage details vary by model and region; refer to your product’s specific warranty card for duration. To initiate a claim, retain proof of purchase and contact Black & Decker customer service. Warranty excludes misuse, abuse, or normal wear and tear.
Coverage Details
The Black & Decker warranty typically covers one year from the original purchase date, protecting against manufacturing defects. This includes issues with functionality, but doesn’t cover accidental damage or commercial use; Proof of purchase is essential for any claim. Specific terms, limitations, and exclusions are outlined in the warranty documentation included with your air fryer toaster oven.
Claim Process
To initiate a warranty claim for your Black & Decker air fryer toaster oven, contact their customer service with your model number and purchase proof. You may need to provide photos or return the defective unit for inspection. A return authorization may be issued, and shipping costs could apply. Detailed instructions are available on the Black & Decker website.