WiFi Panorama Camera Manual: A Comprehensive Guide
Welcome! This manual details setup, operation, and troubleshooting for your WiFi panorama camera․ It covers app installation, network connection, mode selection, and cloud storage options․
WiFi panorama cameras represent a significant advancement in home and business surveillance technology․ Unlike traditional security cameras with limited fields of view, these innovative devices offer 360-degree monitoring capabilities, eliminating blind spots and providing comprehensive coverage of your surroundings․ They connect wirelessly to your existing WiFi network, simplifying installation and offering remote access via smartphone applications․
These cameras often feature pan, tilt, and zoom (PTZ) functionality, allowing you to remotely control the camera’s direction and magnification for closer inspection of specific areas․ Advanced models incorporate intelligent features like motion detection, sending real-time alerts to your mobile device when activity is detected․ Some cameras support various modes, including panorama, bowl, and corridor modes, adapting to diverse monitoring needs․
Furthermore, WiFi panorama cameras offer flexible storage options, including cloud-based recording and local storage via microSD cards․ Understanding the nuances of these features, as detailed in this manual, will empower you to maximize the security and convenience offered by your new camera․ Proper configuration, including selecting the correct WiFi network (2․4GHz is often required), is crucial for optimal performance․
Unboxing and Initial Setup
Carefully unpack your WiFi panorama camera and verify that all components are present․ Typically, the box should contain the camera unit itself, a power adapter, a mounting bracket and screws, a quick start guide, and potentially a reset pin․ Inspect all items for any visible damage incurred during shipping․
Before powering on the camera, select a suitable location․ Ensure it’s within range of your WiFi network and has access to a power outlet․ Avoid placing the camera near metal objects or sources of interference․ Mount the bracket securely to the wall or ceiling using the provided screws․ Attach the camera to the bracket, ensuring it’s firmly connected․
Connect the power adapter to the camera and plug it into a power outlet․ The camera will initiate its startup sequence, indicated by a flashing LED․ Download the corresponding mobile app (detailed in the next section) to your smartphone or tablet․ Do not connect to a 5G WiFi network; ensure your router is configured for 2․4GHz․ The initial setup process will guide you through network connection and account creation․
Camera Component Overview
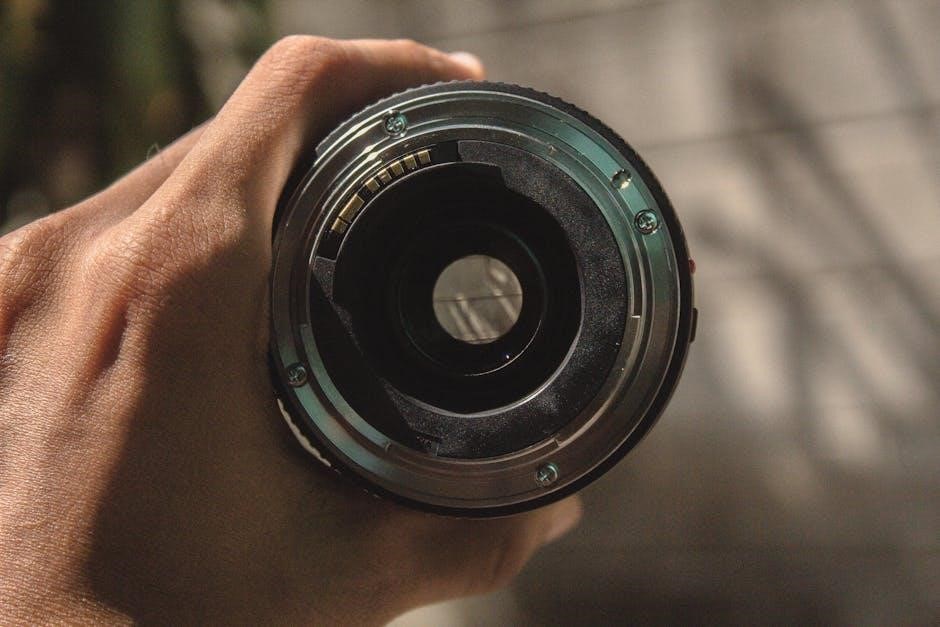
Your WiFi panorama camera comprises several key components․ The primary element is the camera lens, responsible for capturing the panoramic view․ Surrounding the lens are often LEDs for night vision, enabling clear footage in low-light conditions․ A built-in microphone captures audio alongside video․
The camera housing typically includes a reset button, crucial for restoring factory settings if needed․ A power port accepts the provided adapter for operation․ Many models feature a microSD card slot for local storage of recordings, offering an alternative to cloud services․
Externally, you’ll find the mounting bracket interface, allowing secure attachment to surfaces․ Some cameras include a directional indicator, assisting with initial positioning․ Internally, the camera houses a WiFi module for network connectivity and a processor for image processing and encoding․ Electronic PTZ (Pan-Tilt-Zoom) functionality is often integrated, allowing remote control of the camera’s viewing angle via the mobile app․
Connecting to Your WiFi Network

To connect your WiFi panorama camera, ensure your 2․4GHz WiFi network is active – most cameras don’t support 5GHz․ Begin by powering on the camera and launching the mobile app․ Navigate to the device addition section within the app․
The app will typically prompt you to select your WiFi network from a list of available networks․ Enter your WiFi password carefully; incorrect credentials will prevent connection․ The camera may require being placed close to the router during initial setup for a stronger signal․
Some cameras utilize a QR code scanning method – display the QR code from the app on your phone’s screen, and position it before the camera lens․ The camera will then automatically connect․ If connection fails, verify router settings and ensure the camera isn’t blocked by physical obstructions․ Remember the camera and phone should be close during WIFI matching․
Downloading and Installing the Mobile App

The first step to utilizing your WiFi panorama camera is downloading and installing the dedicated mobile application․ This app, often named “JXLCAM” or similar, is your primary interface for controlling and viewing footage from the camera․ You can typically find the app by searching its name on the Apple App Store (for iOS devices) or the Google Play Store (for Android devices)․
Before downloading, verify you’re selecting the correct app – look for the developer associated with your camera model․ Once located, tap “Install” and allow the app to download and install on your smartphone or tablet․ The download time will vary depending on your internet connection speed․

After installation, tap “Open” to launch the app․ You may be prompted to grant the app certain permissions, such as access to your camera, microphone, and local storage – these are necessary for full functionality․ Accept these permissions to proceed․ The application is now available for use!
Navigating the Mobile App Interface
Upon launching the mobile app, you’ll be greeted with the main interface․ This typically features a live view screen, displaying footage from your WiFi panorama camera․ Below or alongside the live view, you’ll find a toolbar or menu containing key functions․
Common icons include a “+” button for adding new cameras, a settings icon (often a gear) for configuring camera parameters, and a playback icon for accessing recorded footage․ Explore the bottom navigation bar; it usually provides access to features like motion detection settings, cloud storage options, and user profiles․
Within the settings menu, you can adjust resolution, sensitivity, and storage preferences․ The app’s interface is designed for intuitive control of PTZ (Pan, Tilt, Zoom) functions and panorama modes․ Familiarize yourself with the layout to efficiently manage your camera’s features and ensure optimal performance․
Adding the Camera to the App
To add your WiFi panorama camera to the mobile app, first ensure your smartphone is connected to a 2․4GHz WiFi network – the camera may not support 5GHz․ Within the app, tap the “+” or “Add Device” button, typically found on the main screen․ The app will likely prompt you to select your camera model from a list or scan a QR code located on the camera itself or in the packaging․
Follow the on-screen instructions carefully․ You’ll be asked to enter your WiFi network name and password․ Ensure these details are correct! The app will then attempt to connect to the camera․ During this process, the camera may emit an audible beep or flash a light to indicate its status․
If the connection fails, double-check your WiFi credentials and ensure the camera is within range of your router․ Some apps require you to press a button on the camera to initiate pairing mode․ Once connected, you can assign a name to your camera for easy identification․
Understanding Camera Modes: Panorama, PTZ, and More
Your WiFi panorama camera offers several viewing modes to enhance surveillance․ Panorama mode provides a wide-angle, 360-degree view of the surrounding area, eliminating blind spots․ PTZ (Pan, Tilt, Zoom) mode allows remote control of the camera’s direction and magnification via the mobile app, enabling focused monitoring of specific areas․
Additional modes may include bowl mode for a hemispherical view, corridor mode for narrow spaces, and split mode for displaying multiple camera feeds simultaneously․ Electronic PTZ utilizes software to digitally pan, tilt, and zoom within the panoramic image, even without a physically moving lens․
The availability of these modes depends on your specific camera model․ Access these modes through the app’s interface, typically found within the live view screen or settings menu․ Experiment with each mode to determine which best suits your monitoring needs․ Understanding these options maximizes the camera’s versatility and effectiveness․
Adjusting Camera Settings: Resolution, Sensitivity, and Storage
Customize your WiFi panorama camera’s performance through its settings menu, accessible via the mobile app․ Resolution controls image clarity; higher resolutions (e․g․, 1080p, 4K) provide sharper detail but require more storage space and bandwidth․ Adjust sensitivity to fine-tune motion detection – higher sensitivity triggers alerts more frequently, while lower sensitivity reduces false alarms․
Storage options include cloud storage (often subscription-based) and local recording to a microSD card (sold separately)․ Configure recording schedules and storage capacity to manage footage effectively․ Explore advanced settings like image brightness, contrast, and saturation for optimal video quality․
Remember to balance resolution, sensitivity, and storage based on your needs․ Regularly review and adjust these settings to ensure reliable performance and efficient resource utilization․ Proper configuration maximizes the camera’s capabilities and provides the best surveillance experience․
Motion Detection and Alert Configuration
Your WiFi panorama camera features intelligent motion detection, alerting you to activity within its field of view․ Configure detection zones within the app to focus on specific areas, minimizing false alarms from irrelevant movement like passing cars or trees․ Adjust the sensitivity level to suit your environment; higher sensitivity detects even minor motion, while lower sensitivity requires more significant movement to trigger an alert․

Customize alert notifications to receive instant updates via push notifications on your smartphone․ Choose specific times for alerts to be active, such as during nighttime or when you’re away from home․ Some models offer advanced features like person detection, distinguishing between humans and other objects․
Regularly review recorded events and adjust detection settings as needed to optimize performance․ Ensure the camera has a clear view of the monitored area for accurate motion detection․ Properly configured motion detection provides reliable security and peace of mind․
Cloud Storage and Local Recording Options
Your WiFi panorama camera offers flexible storage solutions to safeguard your recordings․ Cloud storage provides convenient access to footage from anywhere with an internet connection, offering automatic backups and eliminating the risk of data loss due to physical damage to the camera or local storage․ Subscription plans typically vary based on storage capacity and retention period․
Alternatively, local recording utilizes a microSD card (sold separately) inserted into the camera․ This option provides a cost-effective solution with no recurring fees, but requires manual management of storage space and physical security of the microSD card․ Consider the trade-offs between convenience, cost, and security when choosing your preferred storage method․
Some models support both cloud and local recording simultaneously, offering redundancy and enhanced data protection․ Regularly check the status of your chosen storage option to ensure sufficient space and proper functionality․
Troubleshooting Common WiFi Connection Issues
Experiencing difficulty connecting your WiFi panorama camera? First, verify your router is broadcasting on the 2․4GHz band, as many cameras don’t support 5GHz networks․ Ensure you’ve entered the correct WiFi password within the mobile app – case sensitivity matters! Confirm the camera is within range of your router; obstructions like walls can weaken the signal․
If the connection remains unstable, try restarting both your router and the camera․ Check for firmware updates for both devices, as these often include connectivity improvements․ Consider changing your router’s WiFi channel if it’s congested; utilize a WiFi analyzer app to identify less crowded channels․
Disable any firewall settings that might be blocking the camera’s access․ If problems persist, reset the camera to factory settings (refer to the ‘Manual’ for instructions) and repeat the setup process․ Remember the camera and phone should be close during pairing;
Troubleshooting Camera Functionality Problems
If your WiFi panorama camera isn’t displaying a clear image, check the lens for obstructions․ Verify sufficient lighting in the viewing area; low light can impact image quality․ Explore the app settings to adjust resolution and brightness for optimal viewing․

For issues with panorama or PTZ (Pan-Tilt-Zoom) functionality, ensure you’ve selected the desired mode within the mobile app․ If the camera is unresponsive, try restarting it․ Confirm the firmware is up-to-date, as updates often address operational bugs․
Motion detection not working? Double-check the sensitivity settings in the app; excessively low sensitivity may miss events․ Ensure the designated motion detection zones are correctly configured․ If recording issues occur, verify sufficient storage space (cloud or local) is available․ Consult the manual for specific error codes and solutions․
Firmware Updates and Maintenance
Regular firmware updates are crucial for maintaining optimal WiFi panorama camera performance and security․ These updates often include bug fixes, new features, and enhanced security protocols․ The mobile app typically provides notifications when updates are available; follow the on-screen instructions to install them․
Maintenance involves periodically cleaning the camera lens with a soft, dry cloth to ensure clear image quality․ Avoid using harsh chemicals or abrasive materials․ Check the power adapter and cable for any signs of damage, replacing them if necessary․
Periodically review your cloud storage subscription (if applicable) to ensure sufficient space․ Monitor the camera’s operational status through the app, addressing any error messages promptly․ Refer to the manual for detailed troubleshooting steps․ Keeping your camera updated and well-maintained will prolong its lifespan and ensure reliable operation․
Safety Precautions and Regulatory Information
Please read these safety precautions carefully before operating your WiFi panorama camera․ Avoid exposing the device to extreme temperatures, humidity, or direct sunlight․ Do not disassemble or attempt to repair the camera yourself; contact qualified service personnel for assistance․
Ensure the power adapter is properly grounded and connected to a suitable power source․ Keep the device away from water and other liquids․ This equipment generates radio frequency energy and must be installed and used according to the instructions to avoid interference․
This device complies with relevant regulatory standards․ Operation is subject to the following two conditions: (1) This device may not cause harmful interference, and (2) this device must accept any interference received, including interference that may cause undesired operation․ Refer to the product labeling for specific compliance information․