Vivint Thermostat Manual: A Comprehensive Guide
Welcome! This comprehensive guide details the Vivint thermostat, covering setup, operation, troubleshooting, and integration with the Vivint smart home ecosystem;
Explore detailed instructions and wiring diagrams for seamless installation and optimal performance. Discover how to leverage the Vivint app for remote control and scheduling.
This manual also addresses common issues, error codes, and Z-Wave network integration, ensuring a smooth user experience with your new smart thermostat.
Vivint thermostats represent a cornerstone of modern smart home climate control, seamlessly integrating with the broader Vivint Smart Home System. These devices offer homeowners enhanced comfort, energy efficiency, and convenient remote access. Unlike traditional thermostats, Vivint models are designed for intuitive operation and advanced features, including geofencing, learning algorithms, and detailed energy usage reports.
The Element Thermostat V2 (EV2) is a popular choice, known for its sleek design and robust functionality. Initial setup involves connecting the thermostat to your home’s Wi-Fi network and linking it to your Vivint control panel. Compatibility with various HVAC systems is crucial, and detailed wiring diagrams are essential for proper installation.
Beyond basic temperature adjustments, Vivint thermostats enable users to create customized schedules, respond to real-time conditions, and even integrate with other smart devices. This introduction will lay the groundwork for understanding the full potential of your Vivint thermostat and maximizing its benefits.
Understanding Vivint Element Thermostat V2 (EV2)
The Vivint Element Thermostat V2 (EV2) is a central component of the Vivint smart home experience, offering a blend of functionality and user-friendly design. This thermostat boasts a touchscreen interface for direct control and integrates seamlessly with the Vivint app for remote access. Key features include programmable schedules, geofencing capabilities, and detailed energy usage monitoring.
The EV2 supports both battery and hardwired power options, providing flexibility during installation. It’s designed to connect to your home’s Z-Wave network, enabling communication with other smart devices. Understanding the thermostat’s node type is important during network setup.
The EV2’s menu system allows for customization of settings, including temperature preferences, fan control, and display options. Proper wiring is critical for optimal performance; always consult the provided diagrams and ensure compatibility with your HVAC system. This model prioritizes both comfort and energy savings.
Initial Setup and Installation

Initial setup of your Vivint thermostat requires careful attention to detail. Begin by powering off your HVAC system at the breaker. Read the instructions thoroughly before disconnecting any existing wiring, and meticulously label each wire. Incorrect wiring can damage your system.
Refer to the provided wiring diagrams to ensure correct connections. The Vivint Element CT200 installation guide offers specific guidance. Accessory wiring may be necessary depending on your system’s configuration. Once wired, mount the thermostat securely to the wall.
Power on your HVAC system and follow the on-screen prompts to connect the thermostat to your Vivint smart home system. This typically involves entering your Vivint account credentials. Verify proper operation by testing both heating and cooling modes. A successful installation is crucial for optimal performance.
Wiring Diagrams and Compatibility
Understanding wiring is paramount for a successful installation. There is no standard color coding for HVAC wiring, so accurate labeling of existing wires is essential before disconnection. Vivint provides detailed wiring diagrams specific to various system configurations.
Compatibility depends on your existing HVAC system. The Vivint thermostat generally supports standard 24V systems, but may require a C-wire (common wire) for consistent power. If a C-wire isn’t present, a C-wire adapter might be necessary.
Carefully compare your existing wiring to the diagrams. Common terminals include Rh, Rc, W, Y, and G. Zoned systems require additional wiring considerations. Consult a qualified HVAC technician if you are unsure about any aspect of the wiring process. Incorrect wiring can lead to system malfunction or damage.
Connecting to the Vivint Smart Home System
Integrating your Vivint thermostat with the broader Vivint smart home system unlocks remote control, automation, and energy-saving features. The process typically involves adding the thermostat as a device within the Vivint app.
Ensure your Vivint panel is online and connected to Wi-Fi. Within the app, navigate to the “Devices” section and select “Add Device.” Follow the on-screen prompts to initiate the pairing process. The thermostat will enter pairing mode, often indicated by a specific display message.

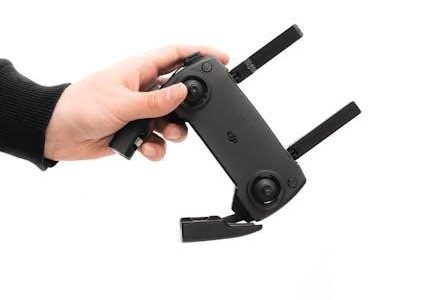
The system utilizes Z-Wave network integration for communication. Refer to your controllers User Manual for detailed instructions on Z-Wave network setup. Successful connection allows control via the app, voice commands, and integration with other Vivint smart devices.

Navigating the Thermostat Interface
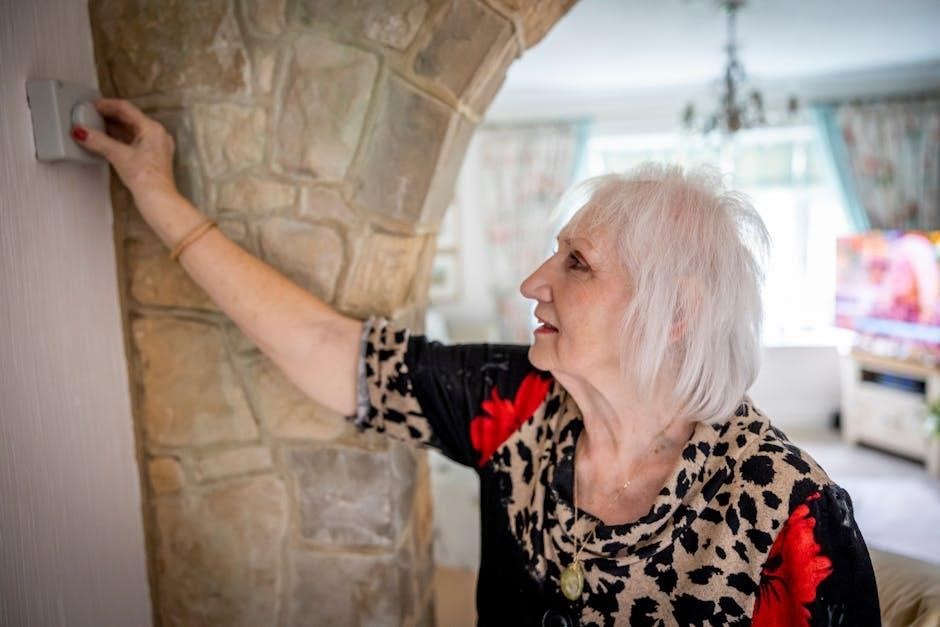
The Vivint thermostat features a user-friendly interface designed for intuitive control. The main screen displays the current temperature, setpoint, and operating mode (Heat, Cool, Auto, Off). Utilize the touchscreen or physical buttons – depending on the model – to adjust settings.
Pressing the MENU button reveals a range of menu options and settings, including scheduling, fan control, system settings, and network information. Explore these options to customize your comfort preferences.
The interface allows for quick temperature adjustments, mode switching, and access to advanced features. Familiarize yourself with the icons and terminology for efficient operation. Refer to the detailed user manual for specific button functions and display interpretations.

Menu Options and Settings
Accessing the menu via the touchscreen or button press unlocks a suite of customizable settings. System Settings allow adjustments to date, time, temperature units (°F or °C), and display brightness. Within Network Settings, you can verify Wi-Fi connectivity and troubleshoot connection issues.
Fan Control offers options for Auto, On, or Circulate modes, influencing air circulation. The Schedule menu enables programming heating and cooling schedules for energy efficiency. Explore Z-Wave Settings to manage network integration with other smart home devices.
Advanced options include filter change reminders and equipment testing. Detailed explanations for each setting are available in the comprehensive user manual. Remember to save any changes made to ensure they are applied to your thermostat’s operation.
Programming Schedules
Scheduling is key to maximizing energy savings with your Vivint thermostat. Access the Schedule menu to create customized heating and cooling plans tailored to your lifestyle. You can define different temperature settings for various times of the day and days of the week.
Create unique schedules for weekdays, weekends, or even individual days. Utilize pre-set modes like “Home,” “Away,” or “Sleep” for quick adjustments. The thermostat supports multiple schedule periods, allowing granular control over temperature throughout the day.
Remember to review and adjust your schedules seasonally to optimize comfort and efficiency. Detailed instructions for creating and managing schedules are available in the user manual. The Vivint app also provides remote access to schedule modifications.
Remote Control via the Vivint App
Control your Vivint thermostat from anywhere with the intuitive Vivint app, available for iOS and Android devices. Once connected to the Vivint Smart Home System, the app provides full remote access to all thermostat functions.
Adjust temperature settings, view current conditions, and manage schedules directly from your smartphone or tablet; Receive real-time alerts regarding temperature fluctuations or system status. The app allows for quick overrides of programmed schedules, ensuring comfort when needed.
Utilize geofencing features to automatically adjust the temperature based on your location. Detailed instructions for app setup and usage are found in the user manual. Ensure your app is updated for optimal performance and access to the latest features.

Z-Wave Network Integration
Vivint thermostats seamlessly integrate into existing Z-Wave networks, enhancing your smart home automation capabilities. This allows for communication with other Z-Wave enabled devices, creating a unified and responsive home environment.
The thermostats node type is pre-determined upon connection to the network. Successful integration requires a compatible Z-Wave controller; consult your controller’s user manual for detailed instructions. Ensure the thermostat is within range of the Z-Wave network for reliable communication.
Adding the thermostat typically involves initiating inclusion mode on both the controller and the thermostat itself. Refer to the Vivint Thermostat Manual for specific pairing procedures. Battery-powered operation may affect Z-Wave range and responsiveness.
Battery Operation and Power Supply
Vivint thermostats offer flexible power options, including both battery and hardwired power. While a C-wire connection provides continuous power, many models can operate solely on batteries, offering installation convenience where wiring is limited.
When running on batteries, the thermostat’s Z-Wave range and responsiveness may be affected. Regularly monitor battery levels within the Vivint app to avoid interruptions in service. The system will provide low-battery warnings, prompting timely replacement.
For optimal performance and to unlock all features, connecting to a mains power supply is recommended. Quickstart installation requires connecting the device to mains power. Always follow safety precautions and wiring instructions detailed in the manual.
Troubleshooting Common Issues

Experiencing problems? This section addresses frequent issues with your Vivint thermostat. A common concern is the thermostat not connecting to Wi-Fi; ensure your network is stable and the password is correct within the Vivint app settings. Restarting both the thermostat and your router can often resolve connectivity problems.
Another frequent issue involves incorrect temperature readings. Verify the thermostat isn’t exposed to direct sunlight or drafts, which can skew results. Recalibrating the temperature sensor through the menu options may also be necessary.
For further assistance, consult the detailed troubleshooting guides and FAQs available on the Vivint support website. Remember to carefully read all instructions before attempting any repairs or adjustments.
Thermostat Not Connecting to Wi-Fi
Connectivity issues? If your Vivint thermostat fails to connect to Wi-Fi, begin by verifying your home network is functioning correctly with other devices. Double-check the Wi-Fi password entered within the Vivint app; even a minor typo can prevent connection.
Restarting both your thermostat and your Wi-Fi router is a simple yet effective troubleshooting step. Ensure the thermostat is within range of your router’s signal. Interference from other electronic devices can also disrupt the connection; try relocating the thermostat if possible.
Consult the manual for specific instructions on re-establishing the Wi-Fi connection through the thermostat’s menu. If problems persist, contact Vivint support for further assistance.
Incorrect Temperature Readings
Experiencing inaccurate temperature readings? First, ensure the thermostat isn’t directly exposed to sunlight, drafts, or heat-generating appliances, as these can skew results. Verify the thermostat is level; an uneven installation can affect sensor accuracy.
Within the Vivint app, check the thermostat’s calibration settings. Many models allow for temperature offset adjustments to fine-tune readings. Compare the thermostat’s reading with a trusted thermometer placed nearby to identify discrepancies.

If the issue continues, a sensor malfunction might be the cause. Refer to your Vivint thermostat manual for instructions on resetting the device. Contact Vivint support if calibration and resetting don’t resolve the problem; professional assistance may be required.
Understanding Error Codes
Vivint thermostats utilize error codes to diagnose system issues. These codes, displayed on the thermostat screen or within the Vivint app, provide valuable clues for troubleshooting. Consult your specific thermostat manual for a complete list and detailed explanations of each code.
Common codes relate to connectivity problems (Wi-Fi, Z-Wave), sensor failures, or HVAC system malfunctions. For example, a communication error might indicate a Z-Wave network disruption. A sensor error suggests a faulty temperature probe.
Before contacting support, attempt basic troubleshooting steps like restarting the thermostat or checking wiring connections. Document the error code and any accompanying symptoms. Vivint’s support team will request this information to efficiently diagnose and resolve the issue.
Vivint Thermostat and Nest Integration
Vivint Smart Home has announced integration with the Nest Learning Thermostat, offering users expanded smart home compatibility. This integration allows Vivint customers to incorporate their existing Nest thermostats into the broader Vivint ecosystem.
Through this connection, Nest thermostat controls and data become accessible via the Vivint app, providing a unified smart home experience. Users can manage temperature settings, view energy usage, and create automated routines alongside other Vivint devices.
The integration was developed to enhance convenience and energy efficiency for homeowners. It’s important to note that specific features and functionality may vary depending on the Vivint system configuration and Nest thermostat model. Refer to Vivint’s support resources for detailed setup instructions and compatibility information.
Safety Precautions and Wiring Instructions
Important Safety First! Before beginning any wiring, disconnect power to your HVAC system at the breaker to avoid electrical shock. Carefully read all instructions before removing any wires from your existing thermostat. Label each wire meticulously – there’s no standard color coding!
Incorrect wiring can damage your HVAC system or the Vivint thermostat. If you are uncomfortable with electrical work, consult a qualified HVAC technician. Ensure wires are securely connected to the terminals on the Vivint thermostat’s backplate.
Refer to the provided wiring diagrams for your specific HVAC system configuration. Accessory wiring may be required for optimal functionality, particularly for C-wire connections. Double-check all connections before restoring power. A quickstart guide confirms this is an HVAC thermostat for U.S./Canada/Mexico, requiring mains power.
Accessing Detailed User Manuals and Support

Need more help? Vivint provides extensive resources to support your thermostat experience. For in-depth information, consult the detailed user manuals available online, often in PDF format, specifically for the Element Thermostat V2 (EV2). These manuals cover everything from initial setup to advanced programming.
Troubleshooting guides, frequently asked questions (FAQs), and helpful “How-to” articles are readily accessible through the Vivint support website. You can find solutions to common issues like Wi-Fi connectivity problems or incorrect temperature readings.
For personalized assistance, contact Vivint customer support directly. They can provide expert guidance and resolve any challenges you may encounter. Remember to reference your thermostat model and any relevant error codes when seeking support. Explore the resources for a seamless experience!